Follow Me On Social Media!
Amazing Textural Desserts: 1 Satisfying Bite
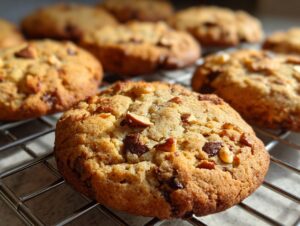
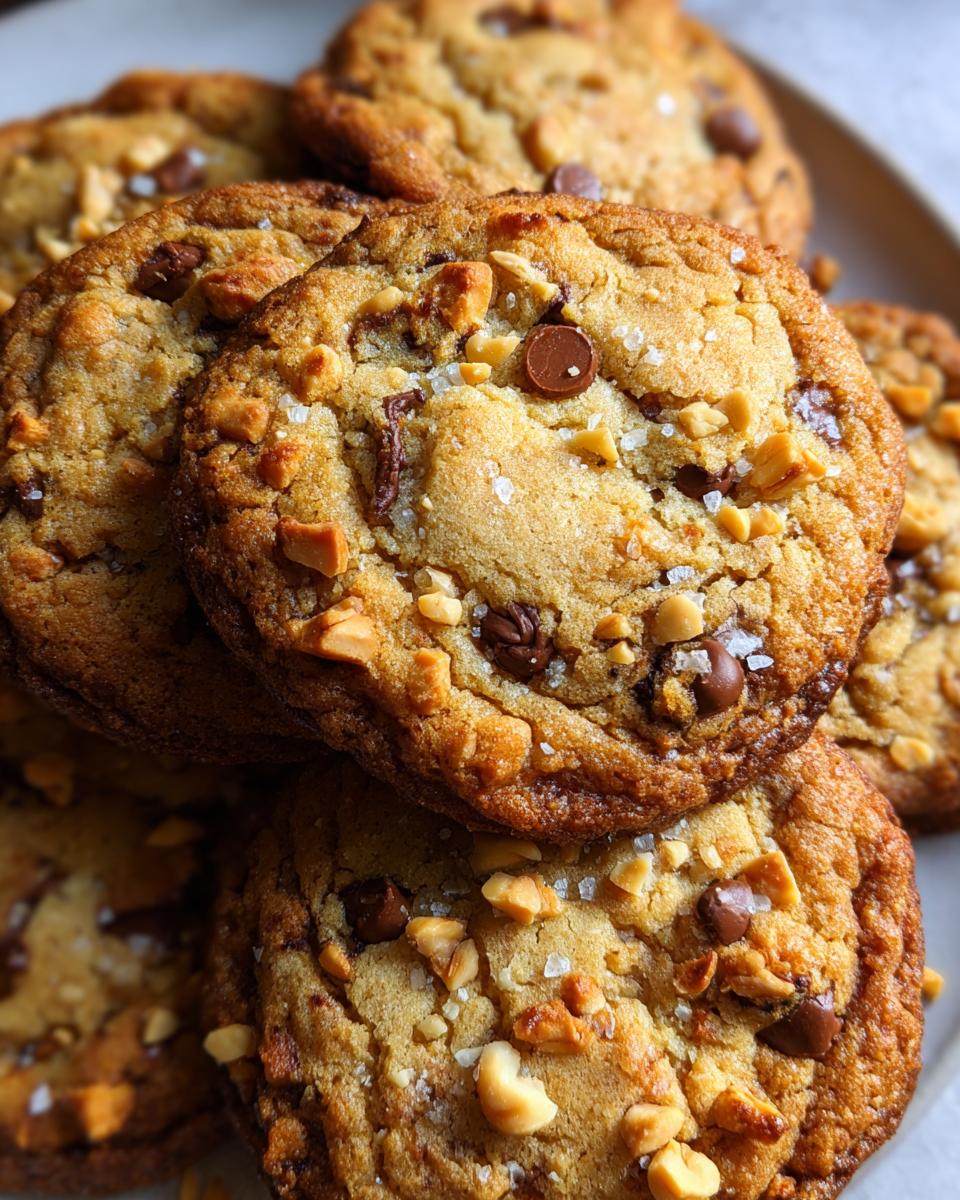
Oh, you know me, I’m always on the hunt for treats that aren’t just *sweet*, but give your mouth something fun to do! That’s why I’m absolutely obsessed with textural desserts. There’s just something so satisfying when you get that perfect bite – a little crunch, a little chew, maybe a melty surprise in there. It’s like a tiny party in your mouth, and honestly, after years of baking, finding that sweet spot where textures play together is my favorite kind of kitchen magic. This recipe? It’s a prime example of why I love creating desserts that make you *experience* every single bite. It’s all about that amazing contrast, that little bit of surprise that makes a simple cookie feel so special.
Gather Your Ingredients for Textural Desserts
Alright, let’s get our goodies together for these amazing textural cookies! You’ll need:
- 1 cup all-purpose flour
- 1/2 cup granulated sugar
- 1/4 cup unsalted butter, nice and softened – this is key!
- 1 large egg
- 1 teaspoon vanilla extract
- 1/2 teaspoon baking powder
- 1/4 teaspoon salt
- 1/2 cup chopped nuts – I love walnuts or almonds, but use your faves!
- And for an extra little surprise, 1/2 cup chocolate chips (totally optional, but who says no to chocolate?)
Flour and Sweeteners for Our Textural Dessert
The flour gives our cookies their structure, that nice sturdy base we want. And the sugar? Well, it’s not just for sweetness, it helps them get that lovely golden color and a little bit of crispness around the edges.
Fats and Binders for the Perfect Texture
That softened unsalted butter is super important here, it makes the cookies tender and rich. And the egg? It’s the binder that holds everything together and adds to that perfect chewy-cookie texture we’re aiming for.
Flavor Enhancers and Leavening Agents
A splash of vanilla extract just makes everything taste better, right? The baking powder is what gives our cookies a little lift, so they aren’t too flat. And the salt? It might seem weird, but it actually balances out the sweetness and makes all the other flavors pop!
The Stars of the Texture: Nuts and Chocolate
Okay, these are where the real fun begins for our textural dessert! The chopped nuts are going to give you that satisfying crunch in every bite. Trust me, toasting them beforehand for just a few minutes makes a HUGE difference in flavor and crunch! And the chocolate chips? They add that melty, gooey contrast. Feel free to mix and match your favorite nuts and chocolates!
Crafting Your Perfect Textural Dessert: Step-by-Step
Alright, let’s get these amazing textural cookies into the oven! First things first, go ahead and preheat your oven to 350°F (175°C). While that’s warming up, grab a baking sheet and give it a good grease and flour – this stops our cookies from sticking, which is a total disaster when you want perfect texture!
Preparing the Dough for Textural Contrast
In a big bowl, we’re going to cream together that softened butter and sugar until it’s nice and fluffy. You want it to look light and pale, almost like whipped honey. Then, beat in your egg and that splash of vanilla extract. In a separate bowl, just give your flour, baking powder, and salt a quick whisk together. Now, the important part: gradually add those dry ingredients to your wet mixture, mixing until it’s *just* combined. Seriously, don’t overmix! A few streaks of flour are fine. Overmixing is the enemy of a good cookie texture.
Incorporating Textural Elements for Your Dessert
Once your dough is just combined, it’s time for the stars of the show! Gently fold in those chopped nuts and chocolate chips, if you’re using them. We fold them in gently so we don’t break them up too much and they stay nice and chunky. This is what’s going to give you those delightful little surprises in every bite!
Baking Your Textural Dessert to Golden Perfection
Now, take spoonfuls of the dough – about a rounded tablespoon works great – and drop them onto your prepared baking sheet. Make sure to space them out a good 2 inches apart because they will spread a little. Pop them into that preheated oven for about 10 to 12 minutes. You’re looking for the edges to be a lovely golden brown, and the centers should look set, not jiggly. Let them hang out on the baking sheet for a few minutes after they come out – this helps them firm up a bit more. Then, carefully transfer them to a wire rack to cool completely. Patience here is key for that perfect final texture!
Tips for Achieving the Ultimate Textural Dessert Experience
Okay, so you’ve made the dough, you’re ready to bake, but let’s talk about making these cookies absolutely *perfect* for that textural dessert experience. A couple of little tricks can make all the difference! First off, remember those nuts? If you have an extra five minutes, give them a quick toast in the oven or a dry skillet. It makes them unbelievably fragrant and adds this amazing extra crunch that’s just *chef’s kiss* for texture.
Ingredient Quality for Superior Texture
And speaking of ingredients, don’t skimp on quality here! Using really good unsalted butter makes a noticeable difference in richness and how tender your cookies turn out. Also, fresh, good-quality nuts will always give you a better crunch than stale ones. It really shows in the final textural dessert!
Baking Precision for Ideal Texture
Oven temperature is your best friend here. Make sure your oven is fully preheated – a hot oven helps the cookies spread just right and get that lovely golden edge without overbaking the center. Keep an eye on them too! Baking them until the edges are golden but the center still looks a tiny bit soft is the secret to that perfect chewy-on-the-inside, slightly crisp-on-the-outside texture.
Understanding the Nutritional Profile of Your Textural Dessert
Just so you know what you’re diving into, here’s a little peek at the nutrition for one of these amazing textural dessert cookies. Keep in mind these are estimates, and they can change a bit depending on the exact brands and types of ingredients you use. On average, one cookie has about 150 calories, 8g of fat (with 3g being saturated), 2g of protein, 18g of carbohydrates, and 10g of sugar. There’s also about 50mg of sodium. It’s a sweet treat, and knowing this helps!
Frequently Asked Questions About Textural Desserts
Got questions about making these awesome textural desserts? I’ve got answers!
Q: Can I use different nuts in this textural dessert recipe?
Absolutely! That’s the beauty of these cookies. While I love walnuts and almonds, feel free to experiment. Pecans, macadamia nuts, or even peanuts would be delicious. Just make sure they’re chopped up nicely so you get that great crunch in every bite of your textural dessert.
Q: How do I make these cookies chewier?
To get a chewier cookie, try using slightly more brown sugar than granulated sugar, or even swapping out half the granulated sugar for more brown sugar. Also, a little trick is to slightly underbake them – take them out when the centers still look a little soft. They’ll firm up as they cool on the baking sheet, leaving you with that perfect chewy texture.
Q: Can I make this textural dessert gluten-free?
You sure can try! You’ll want to swap out the all-purpose flour for a good quality gluten-free all-purpose baking blend that contains xanthan gum. Sometimes gluten-free flours can make cookies a bit crumbly, so you might need to add an extra tablespoon of butter or a touch more liquid if the dough seems too dry. It’s worth a shot for a gluten-free textural dessert!
Q: My cookies spread too much! What did I do wrong?
No worries, it happens! Often, if cookies spread too much, it’s because the butter was too soft, or the oven wasn’t quite hot enough when you put them in. Make sure your butter is softened but not melty, and let that oven preheat fully. Chilling the dough for about 15-30 minutes before baking can also help prevent excessive spreading and give you a thicker, chewier cookie.
Enjoying Your Textural Dessert Creation
So, how did your textural dessert turn out? I’d absolutely LOVE to hear all about it! Did you try toasting the nuts? Did you go all out with the chocolate chips? Tell me your favorite part of the recipe, or any fun twists you added. Sharing your experience helps everyone else make their perfect batch. Drop a comment below and let me know how much you enjoyed this delightful textural dessert!
Print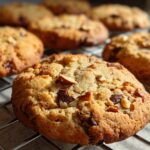
Amazing Textural Desserts: 1 Satisfying Bite
- Total Time: 27 minutes
- Yield: 24 cookies 1x
- Diet: Vegetarian
Description
A delightful dessert featuring contrasting textures, offering a satisfying sensory experience with every bite.
Ingredients
Scale
- 1 cup all-purpose flour
- 1/2 cup granulated sugar
- 1/4 cup unsalted butter, softened
- 1 large egg
- 1 teaspoon vanilla extract
- 1/2 teaspoon baking powder
- 1/4 teaspoon salt
- 1/2 cup chopped nuts (e.g., almonds, walnuts)
- 1/2 cup chocolate chips (optional)
Instructions
- Preheat your oven to 350°F (175°C). Grease and flour a baking sheet.
- In a large bowl, cream together the softened butter and granulated sugar until light and fluffy.
- Beat in the egg and vanilla extract until well combined.
- In a separate bowl, whisk together the flour, baking powder, and salt.
- Gradually add the dry ingredients to the wet ingredients, mixing until just combined. Do not overmix.
- Fold in the chopped nuts and chocolate chips, if using.
- Drop rounded tablespoons of dough onto the prepared baking sheet, spacing them about 2 inches apart.
- Bake for 10-12 minutes, or until the edges are golden brown and the centers are set.
- Let the cookies cool on the baking sheet for a few minutes before transferring them to a wire rack to cool completely.
Notes
- For extra crunch, toast the nuts before chopping them.
- Experiment with different types of nuts and chocolate for varied flavors.
- Ensure your butter is truly softened for the best cookie texture.
- Prep Time: 15 minutes
- Cook Time: 12 minutes
- Category: Dessert
- Method: Baking
- Cuisine: American
Nutrition
- Serving Size: 1 cookie
- Calories: 150
- Sugar: 10g
- Sodium: 50mg
- Fat: 8g
- Saturated Fat: 3g
- Unsaturated Fat: 5g
- Trans Fat: 0g
- Carbohydrates: 18g
- Fiber: 1g
- Protein: 2g
- Cholesterol: 20mg
Keywords: textural dessert, cookies, nutty, chocolatey, sweet treat, crunchy, soft