Follow Me On Social Media!
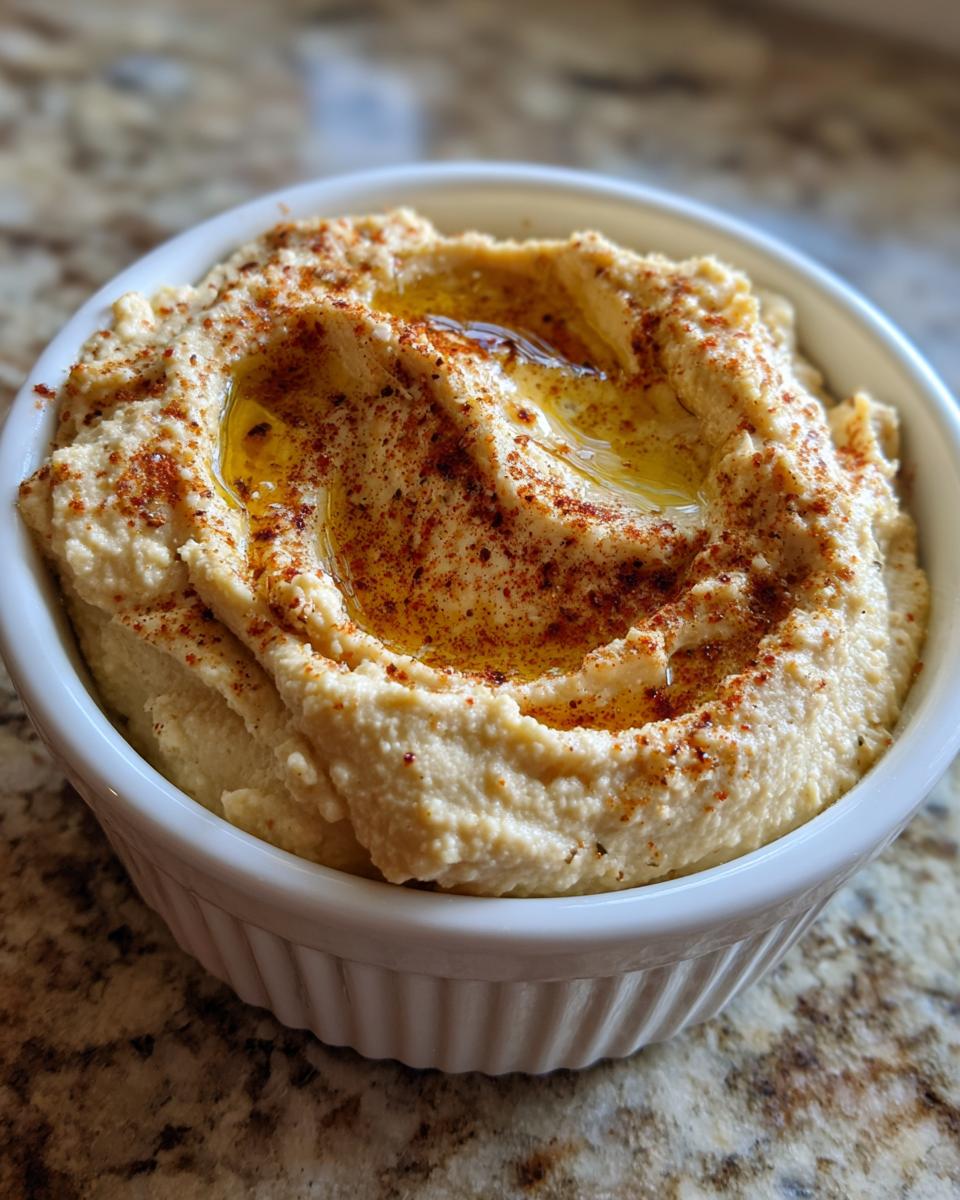
Delicious Roasted Garlic Hummus: 1 Amazing Dip
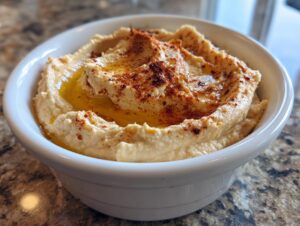
Oh, you guys, if there’s one thing I absolutely *adore* making at home, it’s dips! Forget those store-bought tubs; nothing beats the fresh, vibrant flavors you get from making your own. And when it comes to dips, my go-to, hands-down favorite has to be this incredible roasted garlic hummus. It’s got that creamy texture everyone loves, but with a deep, mellow, almost sweet garlicky kick that takes it to a whole new level. Seriously, if you think you don’t like garlic, this recipe might just change your mind!
I first fell in love with Middle Eastern cuisine years ago during a backpacking trip, and hummus quickly became a staple. But it wasn’t until I started experimenting in my own kitchen that I realized just how simple it is to whip up something truly spectacular. This recipe for roasted garlic hummus is proof that you don’t need fancy equipment or a culinary degree to create something absolutely delicious. It’s perfect for parties, a healthy snack, or honestly, just for eating straight out of the bowl with a spoon (no judgment here!).
Why You’ll Love This Roasted Garlic Hummus
Honestly, what’s not to love? This roasted garlic hummus isn’t just another dip; it’s a total game-changer. I mean, we’re talking about:
- Flavor explosion: The roasted garlic? Oh my gosh, it’s sweet, it’s savory, it’s just… *chef’s kiss*!
- Super easy to make: Seriously, if you can press a button on a food processor, you can make this.
- Healthy-ish: Chickpeas are packed with good stuff, so you can feel good about devouring this.
- Crazy versatile: Dip, spread, sandwich filler – it does it all!
It’s the kind of recipe that makes you feel like a culinary genius without actually trying too hard. Trust me, once you go homemade roasted garlic hummus, you’ll never look back!
The Irresistible Flavor of Roasted Garlic Hummus
Okay, so let’s talk about that roasted garlic. It’s the real star here! Roasting transforms raw garlic from sharp and pungent into this incredibly mellow, sweet, and almost caramelized delight. It infuses the entire hummus with a deep, earthy flavor that you just can’t get any other way. It’s truly magical!
Essential Ingredients for Roasted Garlic Hummus
Alright, let’s get down to business! The beauty of this roasted garlic hummus is how a few simple, good-quality ingredients come together to make something truly spectacular. You don’t need a huge grocery list, just these pantry staples and one star ingredient. Here’s what you’ll want to grab:
- 1 head garlic: This is our secret weapon!
- 1 tablespoon olive oil: Plus a little extra for drizzling later, because, yum!
- 1 (15-ounce) can chickpeas: Make sure they’re rinsed and drained really well.
- 1/4 cup tahini: This gives it that authentic, creamy texture.
- 2 tablespoons fresh lemon juice: Please, no bottled stuff here! Fresh makes all the difference.
- 1/4 cup water: For getting that perfect smooth consistency.
- 1 teaspoon ground cumin: Essential for that classic hummus flavor.
- 1/2 teaspoon salt: To taste, of course!
- Pinch of cayenne pepper (optional): For a little kick, if you’re feeling feisty!
Step-by-Step: How to Make Roasted Garlic Hummus
Okay, now for the fun part – actually making this creamy, dreamy roasted garlic hummus! Don’t be intimidated; it’s honestly so straightforward. You’re going to feel like a total kitchen wizard, I promise. We’ll start with the star of the show, that glorious garlic, and then bring it all together in your trusty food processor. Just follow along, and you’ll have the best hummus you’ve ever tasted in less than an hour!
Preparing Your Garlic for Roasted Garlic Hummus
First things first, let’s get that garlic ready for its glow-up! You’ll want to preheat your oven to a cozy 400°F (that’s about 200°C for my international friends). Grab your head of garlic, and with a sharp knife, carefully slice off the very top quarter – just enough to expose the cloves inside. Drizzle it with about a tablespoon of olive oil, then wrap it snugly in aluminum foil. Pop it into the oven for about 30-40 minutes. You’ll know it’s done when the cloves are super soft and have a lovely light brown, caramelized color. Let it cool a bit; you don’t want to burn your fingers!
Blending Your Perfect Roasted Garlic Hummus
Once that roasted garlic is cool enough to handle, it’s time to bring out the food processor! Squeeze those soft, sweet cloves right into the bowl. It’s so satisfying! Now, add in your rinsed and drained chickpeas, tahini, fresh lemon juice, water, cumin, salt, and if you’re feeling adventurous, that pinch of cayenne. Hit that process button and let it whizz! You’ll want to stop and scrape down the sides a few times to make sure everything gets blended evenly. If it looks a little too thick, just add a tablespoon of water at a time until it reaches your perfect creamy consistency. Give it a taste, and don’t be shy about adjusting the salt or lemon juice until it sings!
Tips for the Best Roasted Garlic Hummus
Okay, so you’ve got the basic steps down, which is awesome! But I’ve picked up a few tricks over the years that can really elevate your roasted garlic hummus from “good” to “OMG, what is this magic?!” These little tweaks are my secret weapons for making sure every batch is absolutely perfect. Trust me, they’re worth the tiny bit of extra effort!
Achieving a Silky Smooth Roasted Garlic Hummus
If you’re like me and you dream of that super silky, restaurant-quality hummus, here’s my number one tip: peel your chickpeas! Yes, it sounds tedious, but those little skins can make your hummus a bit grainy. Just pinch each chickpea between your fingers after rinsing, and the skin pops right off. It makes a HUGE difference in texture!
Serving and Storing Your Roasted Garlic Hummus
Alright, your glorious roasted garlic hummus is ready! Drizzle it with a little extra olive oil, maybe a sprinkle of paprika or some fresh parsley for a pop of color – presentation matters, right? It’s phenomenal with warm pita bread, crunchy veggies, or even spread on a sandwich. For storing, just pop any leftovers into an airtight container in the fridge. It’ll stay fresh and delicious for up to 5 days, perfect for snacking all week long!
Frequently Asked Questions About Roasted Garlic Hummus
I get a lot of questions about making this amazing roasted garlic hummus, especially from folks new to homemade dips! So, I’ve rounded up the most common ones here to help you out. Don’t be shy if you have more – just ask!
Can I Make Roasted Garlic Hummus Without Tahini?
You totally can! While tahini gives hummus that classic, nutty flavor and creamy texture, if you’re out or have an allergy, you can use a tablespoon of a mild nut butter (like cashew or almond butter) or even a little extra olive oil as a substitute. The texture might be slightly different, but it’ll still be delicious!
How Long Does Homemade Roasted Garlic Hummus Last?
Your fresh batch of roasted garlic hummus will keep beautifully in an airtight container in the refrigerator for up to 5 days. Just make sure it’s covered tightly to keep it fresh and prevent it from drying out. I usually make a big batch on Sunday and enjoy it all week!
What Can I Serve with Roasted Garlic Hummus?
Oh, the possibilities are endless! My absolute favorite is warm pita bread, but it’s also fantastic with crunchy veggie sticks like carrots, cucumbers, and bell peppers. It makes a killer spread for sandwiches or wraps, and honestly, a spoonful right out of the fridge is a perfectly acceptable snack in my book!
Estimated Nutritional Information for Roasted Garlic Hummus
Okay, for those of you who like to keep an eye on the numbers (I get it!), here’s a quick peek at the estimated nutritional info for this amazing roasted garlic hummus. Per serving (about 2 tablespoons), you’re looking at roughly 80 calories, 5g of fat, 3g of protein, and 7g of carbs. Just remember, these are estimates and can totally vary depending on the exact brands of ingredients you use. It’s just a guide!
Share Your Roasted Garlic Hummus Experience!
So, you’ve made it! Your kitchen probably smells amazing right now, and I bet you’re already digging into that creamy, dreamy roasted garlic hummus. I’d absolutely LOVE to hear how it turned out for you! Drop a comment below, give the recipe a star rating, or even better, snap a pic and share it on Instagram! Tag me so I can see your delicious creations. Happy dipping!
Print
Delicious Roasted Garlic Hummus: 1 Amazing Dip
- Total Time: 55 minutes
- Yield: 1.5 cups 1x
- Diet: Vegan
Description
Creamy roasted garlic hummus, perfect as a dip or spread. This recipe offers a homemade version of a popular Middle Eastern dish.
Ingredients
Scale
- 1 head garlic
- 1 tablespoon olive oil, plus more for drizzling
- 1 (15-ounce) can chickpeas, rinsed and drained
- 1/4 cup tahini
- 2 tablespoons fresh lemon juice
- 1/4 cup water
- 1 teaspoon ground cumin
- 1/2 teaspoon salt
- Pinch of cayenne pepper (optional)
Instructions
- Preheat oven to 400°F (200°C).
- Cut off the top quarter of the garlic head to expose the cloves. Drizzle with 1 tablespoon olive oil.
- Wrap the garlic head in aluminum foil and roast for 30-40 minutes, or until very soft and lightly browned. Let cool.
- Once cool, squeeze the roasted garlic cloves into a food processor.
- Add the chickpeas, tahini, lemon juice, water, cumin, salt, and cayenne pepper (if using) to the food processor.
- Process until smooth and creamy, stopping to scrape down the sides as needed. If the hummus is too thick, add more water, 1 tablespoon at a time, until desired consistency is reached.
- Taste and adjust seasonings as needed.
- Transfer hummus to a serving bowl. Drizzle with additional olive oil and serve with pita bread, vegetables, or crackers.
Notes
- For a smoother hummus, remove the skins from the chickpeas before processing.
- Store leftover hummus in an airtight container in the refrigerator for up to 5 days.
- Experiment with different toppings like paprika, chopped parsley, or toasted pine nuts.
- Prep Time: 15 minutes
- Cook Time: 40 minutes
- Category: Appetizer
- Method: Roasting, Blending
- Cuisine: Middle Eastern
Nutrition
- Serving Size: 2 tablespoons
- Calories: 80
- Sugar: 1g
- Sodium: 120mg
- Fat: 5g
- Saturated Fat: 0.5g
- Unsaturated Fat: 4g
- Trans Fat: 0g
- Carbohydrates: 7g
- Fiber: 2g
- Protein: 3g
- Cholesterol: 0mg
Keywords: hummus, roasted garlic, dip, spread, chickpea, vegan, appetizer, Middle Eastern