Follow Me On Social Media!
Magnificent Tiramisu Cups Recipe
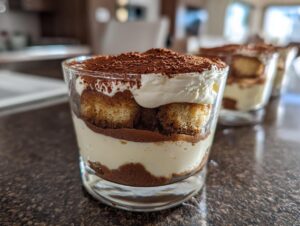
Oh, Tiramisu cups! Seriously, if you’re looking for a dessert that feels fancy but is actually a total breeze to whip up, these are your golden ticket. I love making these Tiramisu cups for any kind of get-together, big or small. There’s just something so elegant about serving them in individual glasses or little ramekins, you know? Plus, everyone gets their own perfect portion of that creamy, coffee-infused goodness. It’s pure Italian magic right in a cup!
Gathering Your Tiramisu Cups Ingredients
Okay, to get these amazing Tiramisu cups going, you’ll need a few key players. First up, we’ve got 2 large eggs. Make sure they’re fresh, that’s always a good start! Then, about 100g of granulated sugar to sweeten things up. The star of the creamy show is 250g of mascarpone cheese – don’t skimp on this, it’s what makes it *so* luxuriously smooth. A teaspoon of vanilla extract just adds that perfect little hug of flavor. For that essential coffee kick, you’ll need 200ml of strong brewed coffee, and make sure it’s cooled down before you use it. If you like a little boozy zing, 2 tablespoons of coffee liqueur is totally optional but highly recommended! And of course, 150g of ladyfingers – those dry, biscuit-like ones work best. Finally, a good dusting of unsweetened cocoa powder to finish it all off. Easy peasy!
Egg Yolks and Sugar Base
First things first, let’s get those egg yolks and sugar going. You want to whisk them together really well until they turn this beautiful pale yellow color and get nice and creamy. It takes a little elbow grease, but it’s totally worth it for that smooth base!
Creamy Mascarpone Mixture
Now, into that lovely yolk mixture, we’re going to gently stir in the mascarpone cheese and that little splash of vanilla extract. Just mix until everything is super smooth and there are no lumpy bits. You’re building that dreamy, creamy foundation here!
Whipped Egg Whites
In a separate, totally clean bowl, whip up your egg whites until they form those lovely stiff peaks. You know, when you lift the whisk and they stand straight up without flopping over? That’s exactly what you’re looking for!
Folding for Lightness
This is where the magic happens for that airy texture! Gently, and I mean *gently*, fold those stiff egg whites into your mascarpone mixture. You don’t want to deflate all that lovely air you just whipped in. Keep it light and fluffy!
Coffee Soak for Ladyfingers
Now for the coffee part! Mix your cooled coffee with the coffee liqueur, if you’re using it. You want to quickly dip your ladyfingers in here – just a quick dunk on each side! Seriously, don’t let them swim around or they’ll get too soggy and fall apart in your Tiramisu cups.
Assembling Your Perfect Tiramisu Cups
Alright, now for the fun part – putting these gorgeous Tiramisu cups together! It’s all about creating those beautiful layers that make Tiramisu so special. You’ll want to grab your individual serving cups or glasses – little wine glasses, pretty ramekins, or even just small bowls work perfectly.
First Layer: Soaked Ladyfingers
Take those coffee-dipped ladyfingers and arrange them snugly in the bottom of your chosen cups. Try to get a nice, even layer. Don’t worry if there are tiny gaps; the creamy filling will fill them in!
Second Layer: Creamy Mascarpone
Now, grab a big spoonful of that luscious mascarpone mixture you made. Spoon it right over the ladyfinger layer. Make sure you get a nice, even coating that covers all those coffee-soaked biscuits.
Repeating Layers for Tiramisu Cups
This is where you build up all that deliciousness! Just repeat the process: another layer of those quick-dipped ladyfingers, followed by another generous layer of the creamy mascarpone mixture. Keep going until your cups are nice and full, ending with that dreamy mascarpone on top. It looks so inviting already!
Chilling for Flavor Fusion
This is super important, so don’t skip it! You need to cover your Tiramisu cups and pop them in the fridge for at least 4 hours. Honestly, overnight is even better. This gives all those amazing flavors time to mingle and meld together, and it lets the Tiramisu set up perfectly. Trust me, the wait is worth it!
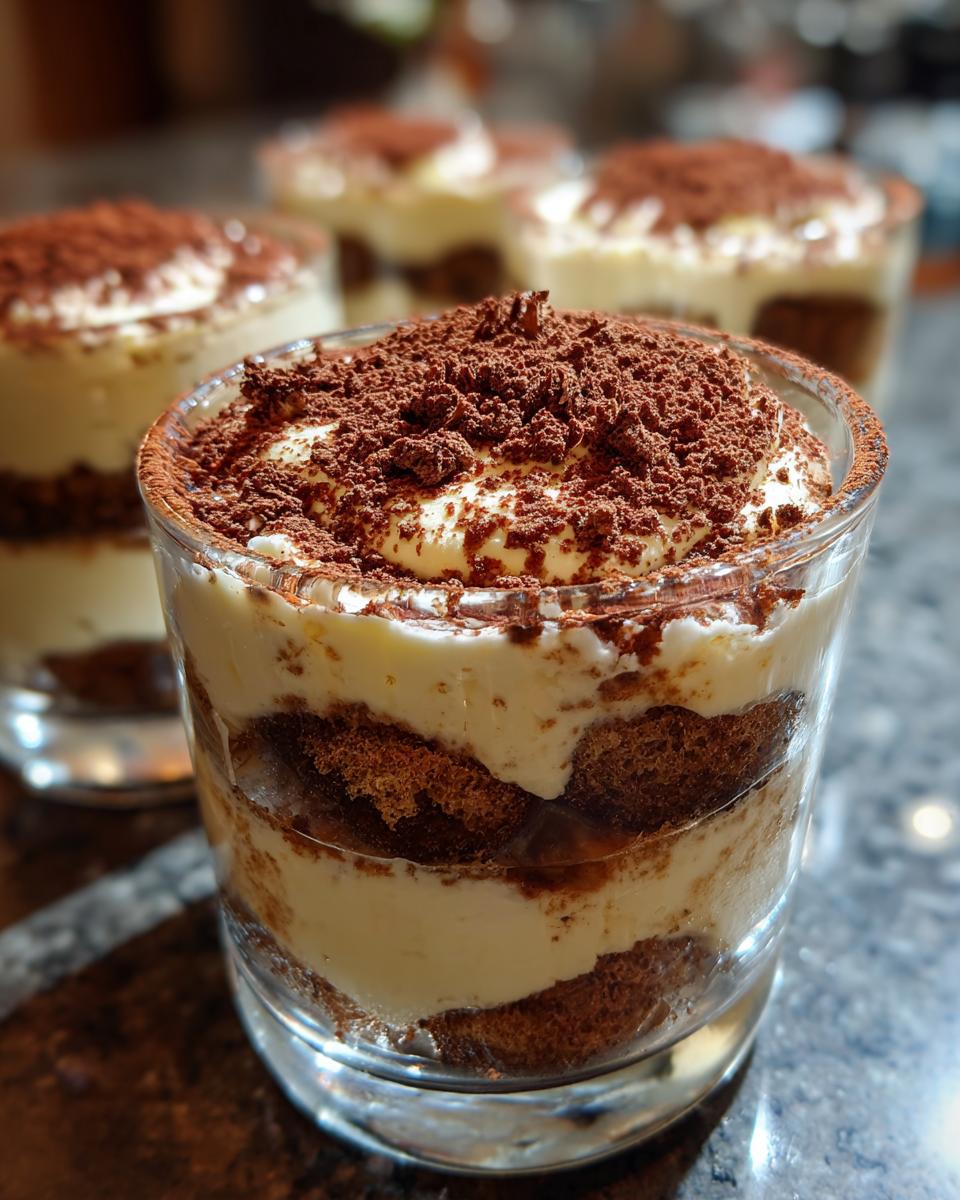
Finishing Touches for Your Tiramisu Cups
The very last thing you do before serving these beauties is a generous dusting of unsweetened cocoa powder right on top. Use a fine-mesh sieve for this – it gives you this perfect, even layer that looks so professional. It adds that lovely hint of bitterness to contrast with the sweet creaminess. Honestly, it just makes these Tiramisu cups look absolutely irresistible!
Frequently Asked Questions About Tiramisu Cups
Got questions about whipping up these delightful Tiramisu cups? I totally get it! Here are a few things people often ask:
Can I make Tiramisu cups ahead of time?
Oh, absolutely! In fact, I highly recommend it. Making your Tiramisu cups ahead of time, ideally the night before, is the secret to letting all those yummy flavors really meld together. Just keep them covered in the fridge. They’ll be even better the next day!
What is the best way to soak ladyfingers for Tiramisu cups?
This is a crucial step, so listen up! You want to give your ladyfingers a really *quick* dip in the coffee mixture, just a second or two on each side. Seriously, don’t let them sit there and soak! If they get too soggy, they’ll just turn mushy in your Tiramisu cups, and nobody wants that. A quick dunk is all they need!
Can I substitute mascarpone cheese in Tiramisu cups?
Mascarpone is really the star here for that authentic, super-creamy texture. While you can *try* to substitute it with something like cream cheese mixed with a little heavy cream, it won’t be quite the same. Mascarpone has a unique, delicate flavor and a smoother consistency that’s hard to replicate perfectly. For the best Tiramisu cups, I really encourage you to stick with real mascarpone!
Equipment Needed for Tiramisu Cups
You don’t need a whole lot of fancy gadgets for these amazing Tiramisu cups, which is part of why I love them! You’ll definitely want a couple of mixing bowls – one for your yolks and mascarpone, and another for whipping those egg whites. A whisk is essential for both getting the yolks creamy and for whipping the whites until stiff. A rubber spatula or a large spoon is perfect for gently folding everything together and for layering. And, of course, you’ll need your individual serving cups or glasses! Oh, and a fine-mesh sieve is great for that final, pretty cocoa dusting.
Ingredient Notes and Substitutions for Tiramisu Cups
Let’s chat about some of the ingredients for these fantastic Tiramisu cups. First off, the coffee! I like using a really strong brew, like espresso or a dark roast, because that coffee flavor is key. If you prefer it less intense, just use a milder coffee or even decaf. Now, about that coffee liqueur – it adds a wonderful depth, but if you’re making these for folks who don’t drink alcohol, or you just don’t have it on hand, no worries at all! You can simply leave it out, or maybe add an extra splash of vanilla extract or even a tiny bit of almond extract for a different kind of warmth. And for the ladyfingers, look for the crispy Italian Savoiardi kind. They soak up liquid without turning to mush too quickly. If you can’t find them, a similar crisp biscuit might work, but be extra careful with the dipping time!
Tips for Perfect Tiramisu Cups Every Time
Okay, so you want your Tiramisu cups to be absolutely perfect? I hear you! My biggest tip is all about that coffee dip. Seriously, a super quick dunk is all those ladyfingers need! If they soak too long, you’ll end up with a soggy bottom, and that’s just sad. Also, make sure your mascarpone is at room temperature when you mix it; it makes it way easier to get that super smooth, creamy texture without any lumps. And don’t rush the chilling time! Letting those flavors meld in the fridge overnight really makes all the difference. It transforms them from good to absolutely divine!
Serving Suggestions for Tiramisu Cups
These Tiramisu cups are pretty much a dessert all on their own, but if you want to make it a whole experience, I love serving them with a tiny cup of extra strong espresso or a lovely cappuccino on the side. It really complements that coffee flavor! Sometimes, for a special occasion, I’ll add a few fresh raspberries or a tiny mint sprig on top just before dusting with cocoa. It adds a pop of color and a little freshness that’s just lovely!
Storing and Reheating Leftover Tiramisu Cups
Got leftovers? Lucky you! These Tiramisu cups store beautifully in the fridge. Just make sure they’re tightly covered with plastic wrap or in an airtight container. They’ll stay delicious for about 2-3 days. As for reheating, honestly, you don’t need to! Tiramisu is best served chilled, so just pull them out of the fridge a few minutes before you plan to enjoy them again. They’re just as good, if not better, the next day!
Nutritional Information Disclaimer for Tiramisu Cups
Just a little heads-up about the nutritional info for these yummy Tiramisu cups! Those numbers you see are just estimates, you know? They can change a bit depending on the exact brands of ingredients you use, how big you make your individual cups, and even the size of the eggs. So, think of them as a general guide rather than super precise science!
Print
Magnificent Tiramisu Cups Recipe
- Total Time: 4 hours 30 minutes
- Yield: 6 servings 1x
- Diet: Vegetarian
Description
Individual portions of classic Tiramisu, layered with coffee-soaked ladyfingers and a creamy mascarpone mixture, dusted with cocoa.
Ingredients
Scale
- 2 large eggs, separated
- 100g granulated sugar
- 250g mascarpone cheese
- 1 teaspoon vanilla extract
- 200ml strong brewed coffee, cooled
- 2 tablespoons coffee liqueur (optional)
- 150g ladyfingers
- Unsweetened cocoa powder, for dusting
Instructions
- Whisk egg yolks and sugar until pale and creamy.
- Stir in mascarpone cheese and vanilla extract until smooth.
- In a separate bowl, whip egg whites until stiff peaks form.
- Gently fold whipped egg whites into the mascarpone mixture.
- Combine cooled coffee and coffee liqueur (if using) in a shallow dish.
- Quickly dip ladyfingers into the coffee mixture, one by one.
- Arrange a layer of soaked ladyfingers in the bottom of individual serving cups or glasses.
- Spoon a layer of the mascarpone mixture over the ladyfingers.
- Repeat layers until cups are full, ending with the mascarpone mixture.
- Cover and refrigerate for at least 4 hours, or preferably overnight.
- Just before serving, dust the top generously with cocoa powder.
Notes
- Ensure eggs are fresh.
- Do not over-soak the ladyfingers, or they will become soggy.
- For a non-alcoholic version, omit the coffee liqueur.
- Adjust coffee strength to your preference.
- Prep Time: 30 minutes
- Cook Time: 0 minutes
- Category: Dessert
- Method: No-Bake
- Cuisine: Italian
Nutrition
- Serving Size: 1 cup
- Calories: 350 kcal
- Sugar: 25g
- Sodium: 50mg
- Fat: 20g
- Saturated Fat: 12g
- Unsaturated Fat: 8g
- Trans Fat: 0g
- Carbohydrates: 30g
- Fiber: 1g
- Protein: 8g
- Cholesterol: 150mg
Keywords: Tiramisu cups, individual tiramisu, no-bake dessert, Italian dessert, coffee dessert, mascarpone dessert, ladyfinger dessert, cocoa dessert